 Save
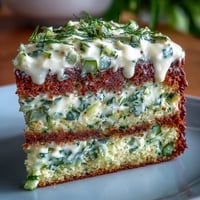
Save My sister texted me three weeks before her birthday with a single demand: no store-bought cake. She wanted something that looked like it belonged in a fancy bakery window, but tasted like home. I found myself standing in the farmers market on a Saturday morning, examining trays of violas and pansies, suddenly understanding why she'd asked for the impossible. These mini layer cakes became my answer—delicate, colorful, and just fancy enough to feel like a celebration without requiring a culinary degree.
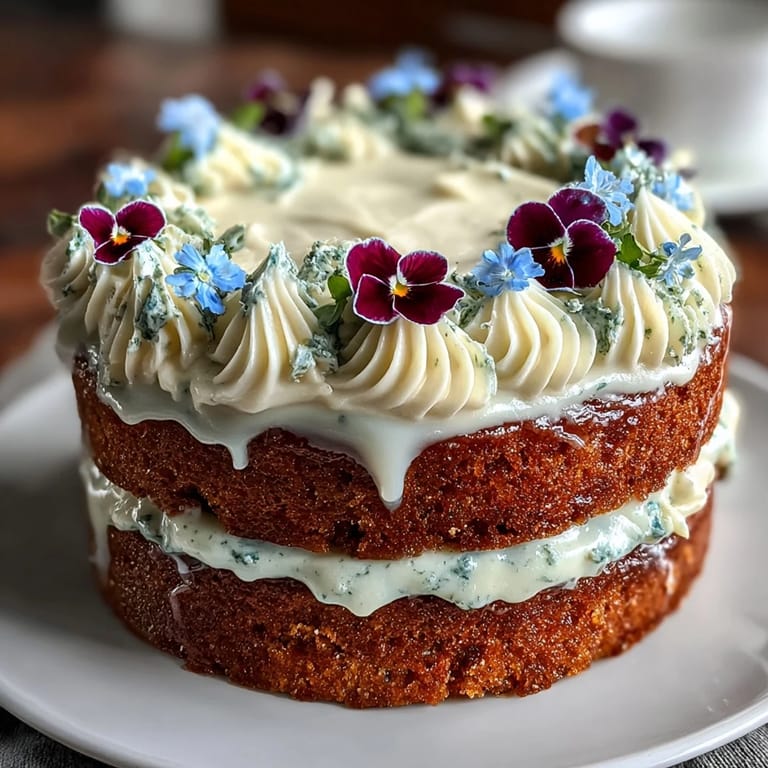
I'll never forget watching my sister's face when she saw six individual cakes lined up on the table, each one crowned with a different colored flower. She actually gasped—not the polite kind, but real surprise. That moment, when something you made with your own hands stops being a recipe and becomes a memory someone carries with them, that's when you understand why people bake for the people they love.
Ingredients
- All-purpose flour (1 1/4 cups): The foundation for tender crumb—don't sift unless your flour is clumpy, as over-working develops gluten and makes cakes tough.
- Baking powder (1 tsp): Your leavening agent that gives these cakes their delicate lift; make sure it's fresh and not sitting in the back of your cabinet for two years.
- Salt (1/4 tsp): A tiny pinch that amplifies vanilla and lemon without making anything taste salty—trust it.
- Unsalted butter (1/2 cup for cake, 3/4 cup for frosting): Room temperature is non-negotiable; cold butter won't cream properly and you'll end up with a dense cake instead of fluffy.
- Granulated sugar (3/4 cup): Beaten with butter until pale, it's what incorporates air into the batter and creates that light, springy texture.
- Eggs (2 large, room temperature): Temperature matters because cold eggs won't blend smoothly with the butter-sugar mixture, creating lumps you can't fix.
- Pure vanilla extract (1 tsp for cake, 1 tsp for buttercream): Don't skimp on imitation; the real stuff makes an audible difference in flavor depth.
- Lemon zest (1/2 tsp): The oils in fresh zest brighten the entire cake without making it taste citrusy—one of those ingredients that works quietly behind the scenes.
- Whole milk (1/2 cup, room temperature): Warm milk blends into batter without shocking the temperature and creating uneven texture.
- Powdered sugar (2 cups, sifted): Lumps in frosting are impossible to beat out, so take the thirty seconds to sift it first.
- Edible flowers (approximately 30 g): Source these from specialty food suppliers or farmers markets that specifically grow pesticide-free varieties; a grocery store bouquet is not the same thing.
Tired of Takeout? 🥡
Get 10 meals you can make faster than delivery arrives. Seriously.
One email. No spam. Unsubscribe anytime.
Instructions
- Heat and Prepare:
- Preheat your oven to 350°F and line a 9x13 inch baking sheet with parchment paper, then give it a light grease so the edges don't stick. This is also the moment to gather everything you'll need—mise en place isn't fancy, it's just smart.
- Mix the Dry Ingredients:
- Whisk flour, baking powder, and salt in a medium bowl until they're evenly combined. This aeration from whisking means you won't need to overmix later, which is the secret to tender cakes.
- Cream Butter and Sugar:
- Beat softened butter with sugar in a large bowl for about three minutes until it's noticeably pale and fluffy—this is where all the air gets incorporated. You'll hear the mixer lighten in tone as you go; that's a good sign.
- Incorporate Eggs Carefully:
- Add eggs one at a time, beating well after each addition so they fully emulsify with the butter. Add vanilla and lemon zest after the eggs are fully mixed in.
- Build the Batter Gently:
- Add half the flour mixture, then the milk, then the remaining flour, mixing gently after each addition just until combined. Stop mixing as soon as you don't see dry streaks—overmixing is the enemy of tender crumb.
- Bake:
- Spread batter evenly onto your prepared sheet and bake for 18 to 22 minutes, until a toothpick inserted in the center comes out clean. The cake should spring back slightly when you touch the center lightly.
- Cool and Cut:
- Let the cake cool completely on the baking sheet—this takes patience, but cutting warm cake is heartbreak waiting to happen. Once cool, use a 2.5 to 3 inch round cutter to cut out 12 circles, re-rolling scraps gently if needed.
- Make the Buttercream:
- Beat softened butter until creamy, then gradually add sifted powdered sugar, vanilla, salt, and milk. Beat until light and fluffy, adding more milk by the teaspoon if it feels too stiff. If you want color, add food coloring drop by drop—it's easier to add than remove.
- Assemble the Cakes:
- Place one cake round on a plate, spread with a thin layer of buttercream, top with another round, then add another thin layer of frosting. This is where patience matters—too much frosting and they become unstable.
- Decorate and Chill:
- Top each mini cake with more buttercream and arrange edible flowers on top, pressing gently so they stay put. Chill for 15 minutes before serving so the structure sets and the flavors meld.
 Save
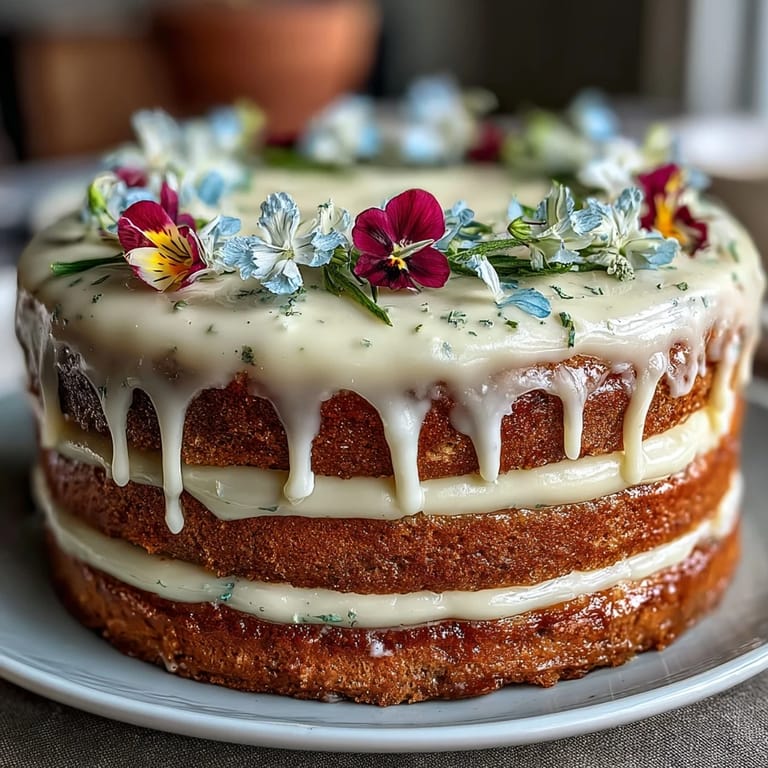
Save There's something about arranging those flowers on top of each cake that felt almost meditative. My hands slowed down, the kitchen got quiet except for the small clink of my offset spatula, and I stopped thinking about whether they were perfect. They weren't—one viola tilted slightly, two pansies overlapped—but that made them real.
The Science of Tender Crumb
The reason these cakes have such a delicate structure comes down to how butter and sugar work together. When you beat them for those three minutes, you're not just mixing—you're incorporating tiny air bubbles that expand in the oven and create structure. The moment you add flour, you have to stop; continued mixing develops gluten, which tightens the crumb and makes everything dense. It's counterintuitive because your instinct is to keep beating until everything looks smooth, but restraint is the actual ingredient here.
Why Layer These Cakes at All
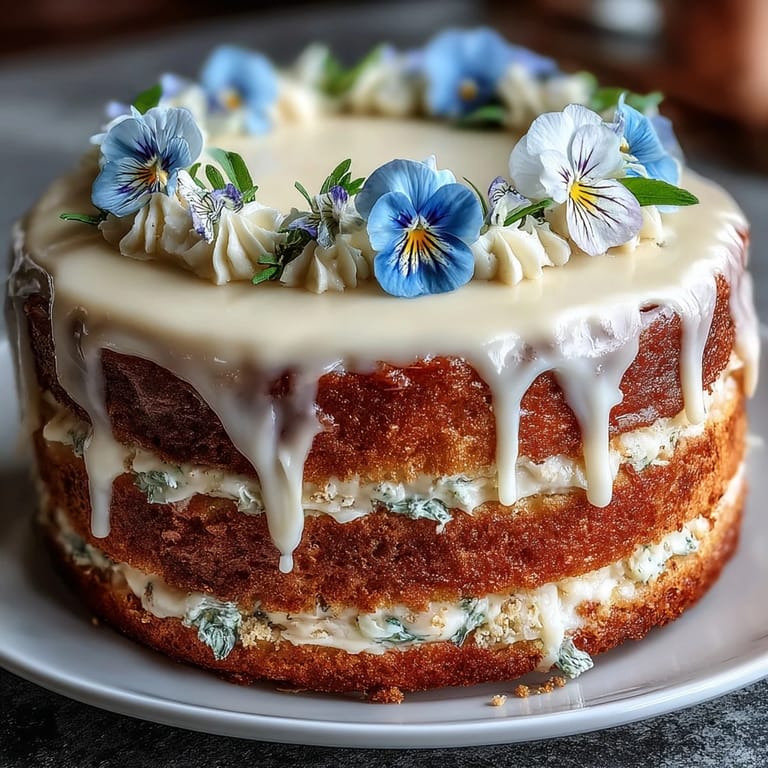
When I first made single-layer versions, they looked fine but tasted unbalanced—too much cake, not enough frosting to complement it. The moment I stacked two layers with buttercream in between, everything shifted. The frosting became structural, the cake became lighter, and each bite contained both elements in conversation with each other. It's the same cake, but arranged differently, and suddenly it tastes better. That taught me something about how presentation isn't separate from flavor.
Edible Flowers and Why They Matter
I used to think edible flowers were just decoration, a garnish that didn't change the actual eating experience. Then I bit into a viola and tasted something faintly peppery and green underneath the sweetness. The flowers aren't just sitting there looking pretty—they're adding texture, a whisper of flavor, and a genuine moment of discovery when someone bites into the cake. They transform these from nice desserts into conversations.
- Violas have a delicate, slightly peppery taste that doesn't compete with vanilla and lemon.
- Nasturtiums bring a peppery kick, so use them sparingly if you want subtlety.
- Always verify that your flowers are food-safe, pesticide-free, and sourced from someone who knows what they're doing.
 Save
Save These cakes remind me that celebration doesn't require perfection—it requires intention and a little bit of mess. My sister ate hers slowly, savoring each layer, and that was enough.
Recipe FAQs
- → What types of edible flowers are best for decorating?
Violas, pansies, and nasturtiums are excellent choices, known for their vibrant colors and food-safe qualities when sourced properly.
- → How can I enhance the lemon flavor in the layers?
Adding a light brush of citrus syrup between layers amplifies lemon notes without overpowering the balance of flavors.
- → Can I prepare the buttercream in advance?
Yes, buttercream can be made ahead and stored in the refrigerator; bring it to room temperature and re-whip before assembling.
- → What is the best method for cutting uniform mini cake layers?
Using a 2.5–3 inch round cutter ensures even, consistent layers ideal for assembling neat mini cakes.
- → How long should the cakes chill before serving?
Chilling the assembled cakes for at least 15 minutes helps set the buttercream and improves texture for serving.