 Save
Save There's something about the smell of caramel bubbling on the stove that takes me right back to September afternoons at a farmers market where I watched a vendor dip apples with such casual confidence that I decided I had to try it myself. My first batch was a disaster—the caramel broke, the apples slid off the sticks, and I ended up with what looked like a crime scene on my kitchen counter. But something about that failure made me determined to get it right, and when I finally nailed the soft-ball stage and that first apple emerged perfectly glossy and golden, I understood why this simple treat has been a fall staple for generations.
Last October I brought a batch to a Halloween party thinking they'd be a cute side offering, but they vanished within minutes while my carefully planned charcuterie board sat largely untouched. One friend came back three times asking if there were more, and another admitted she'd been thinking about them for weeks afterward. That's when I realized these aren't just a dessert—they're the kind of homemade touch that people actually remember.
Ingredients
- 8 small to medium crisp apples (Granny Smith or Honeycrisp): Use smaller apples so they're easier to dip and eat, and crisp varieties hold their structure better; wash and dry them completely because any moisture will make the caramel slide right off.
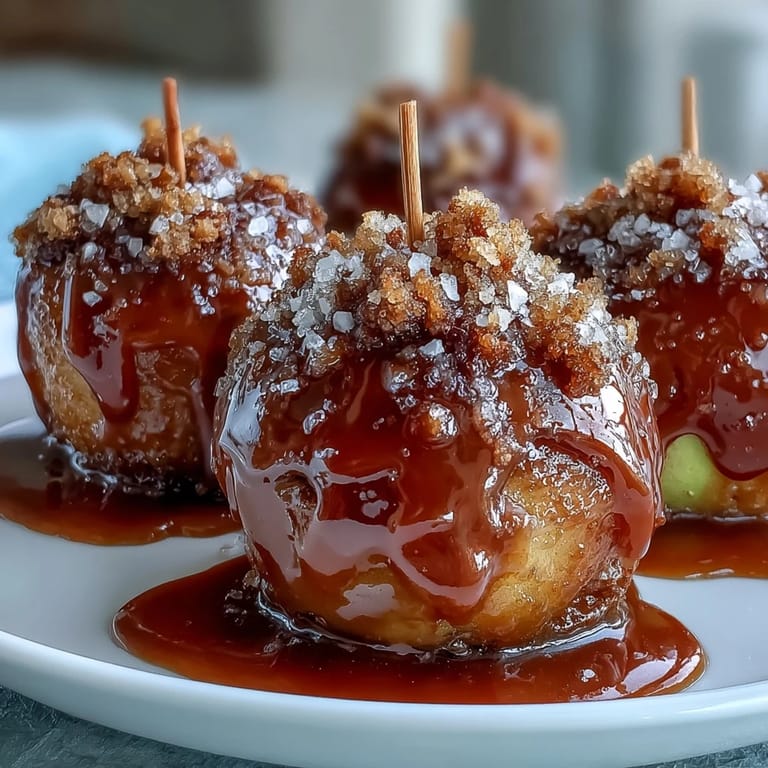
- 8 sturdy wooden sticks: These need to be thick enough to support the weight without snapping, and inserting them firmly through the stem creates your anchor point.
- 1 cup unsalted butter: Unsalted gives you control over the salt level and creates that rich, luxurious mouthfeel that makes homemade caramel sing.
- 2 cups packed light brown sugar: The molasses in brown sugar deepens the flavor and adds a subtle complexity that white sugar alone can't achieve.
- 1 cup light corn syrup: This prevents crystallization and keeps your caramel smooth and glossy instead of grainy.
- 1 can sweetened condensed milk: This ingredient is the secret to that creamy, thick caramel texture that clings to the apple without being overly hard.
- 1/4 teaspoon fine sea salt (in the caramel): This enhances the sweetness and should be mixed into the caramel itself, not just sprinkled on top.
- 1 teaspoon pure vanilla extract: Added at the end, this rounds out the flavor and adds a warmth that makes the whole thing taste more sophisticated.
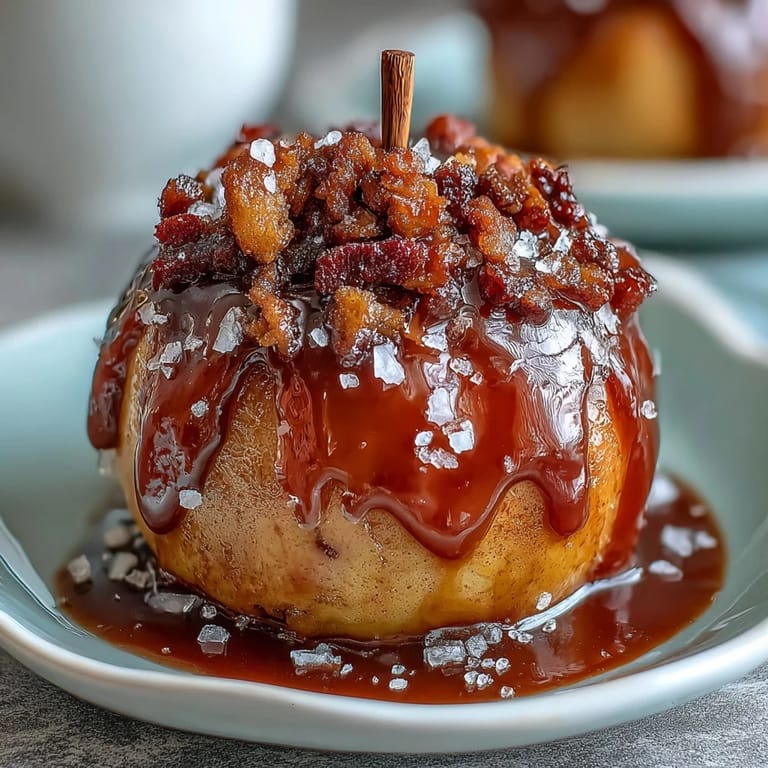
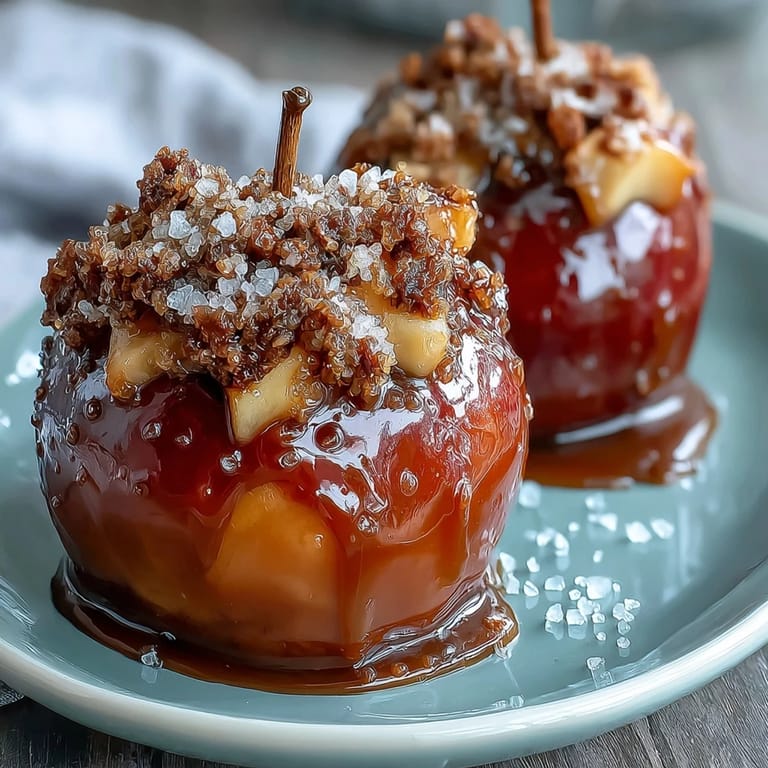
- 2–3 teaspoons flaky sea salt (Maldon preferred): The flakes dissolve on your tongue and create that addictive sweet-salty contrast that keeps you coming back.
Tired of Takeout? 🥡
Get 10 meals you can make faster than delivery arrives. Seriously.
One email. No spam. Unsubscribe anytime.
Instructions
- Prepare your station:
- Line a baking sheet with parchment paper, grease it lightly so the apples don't stick later, and insert wooden sticks firmly into each apple right where the stem is. You want them secure enough that they won't wiggle when you're dipping into hot caramel.
- Build the caramel base:
- Melt butter over medium heat in your heavy-bottomed saucepan—this is crucial because thin pans create hot spots that can burn your caramel. Once the butter is foaming, stir in brown sugar, corn syrup, condensed milk, and fine sea salt until everything dissolves together.
- Reach the boil:
- Keep stirring constantly with a wooden spoon or heatproof spatula, scraping the bottom and sides so nothing sticks or burns. The mixture will bubble up and smell incredibly rich—this is when you know it's actually doing something.
- Monitor the temperature:
- Clip your candy thermometer to the pan and watch it carefully as it climbs toward 240°F. This soft-ball stage typically takes 10 to 15 minutes, and the difference between 235°F and 245°F is the difference between caramel that slides off and caramel that grips.
- Finish and cool:
- The moment it hits 240°F, pull it off heat immediately and stir in vanilla extract—the mixture will smell amazing and slightly thicken. Let it sit for 2 to 3 minutes so it cools just enough to coat without running right off your apples.
- Dip with confidence:
- Holding each apple by its stick, plunge it into the caramel at an angle and rotate it so the coating is even. Let excess caramel drip back into the pan for a few seconds, then place it on your prepared sheet with enough space that they don't touch.
- Season while it's sticky:
- The moment each apple hits the sheet, sprinkle it lightly with flaky sea salt so it sticks to the still-warm caramel. Work quickly because once the caramel starts setting, the salt won't adhere the same way.
- Let them rest:
- Give them at least 30 minutes at room temperature to firm up completely before wrapping or serving. Patience here means the difference between crispy caramel and a sticky mess.
 Save
Save My neighbor once mentioned she'd never seen homemade candy apples before, so I made a batch and left them on her porch during one of those weird warm October days. She texted me a photo of her kids' faces covered in caramel with the caption "You've created monsters," and honestly, that became my favorite compliment. There's something about giving someone food you made with your own hands that transforms it from just dessert into something that matters.
The Sweet-Salty Science
The reason candy apples with sea salt work so beautifully comes down to how salt enhances sweetness perception—it's not a new trick, but it's one that deserves respect. When salt hits your tongue alongside sugar, your brain registers the sweetness as more intense and satisfying, which is why these apples feel less cloying than plain caramel-dipped ones. This is also why a tiny pinch in the caramel itself makes everything taste better without tasting salty.
Choosing Your Apples Matters
I've tried this with softer apples and the results were mushy and disappointing, so the crispness of varieties like Granny Smith or Honeycrisp is genuinely important. The tart notes in these apples also balance the richness of the caramel in a way that sweeter apples can't replicate. Size matters too—bigger apples are harder to dip evenly, and smaller ones are actually easier to eat in a reasonable number of bites.
Troubleshooting and Variations
If your caramel seems too thick or starts setting before you finish dipping, you can gently reheat it over low heat while stirring; if it's too thin and slides right off, you didn't cook it to temperature. I've also discovered that rolling the dipped apples in toasted chopped nuts before the caramel sets completely creates a texture that's almost as much fun as the flavor, and a drizzle of melted dark chocolate across the top feels fancy without requiring any real skill.
- Keep everything warm and work quickly so your caramel doesn't seize up mid-project.
- If you need to make these ahead, store them in a cool place away from humidity so the caramel stays crisp.
- A drop of parchment paper under each apple prevents sticking and makes cleanup almost painless.
 Save
Save These apples taste best eaten within a day or two while the caramel still has that satisfying snap, though they'll keep for several days in an airtight container. There's something deeply satisfying about making something this elegant and delicious that started as a farmers market impulse and turned into something you make with real confidence.